What is an organization?
An organization is a group of users that have access to a shared account. As such, they can all access the different repositories of the organization. An organization can be composed of several teams, each having a defined role in the project's development and also different access rights. This makes organizations an easy and powerful tool to collaborate on a project.
Everyone can create organizations on Codeberg for free. The following sections will show you how to create and manage an organization.
Details about the roles involved (owner, admin, member, etc) are given in the section Access rights below.
Create an Organization
On your Dashboard, click on the + next to your avatar and select New Organization:

In the new page, choose a name for your organization (here we choose PolarClub) and select its visibility.
Finally, choose what the administrators of repositories can do; if the box is ticked, repository administrators will be
able to grant any team access to the repository (see Access rights below for details on repository administrators).
Confirm by clicking Create Organization:

You're now directed to the organization's dashboard.
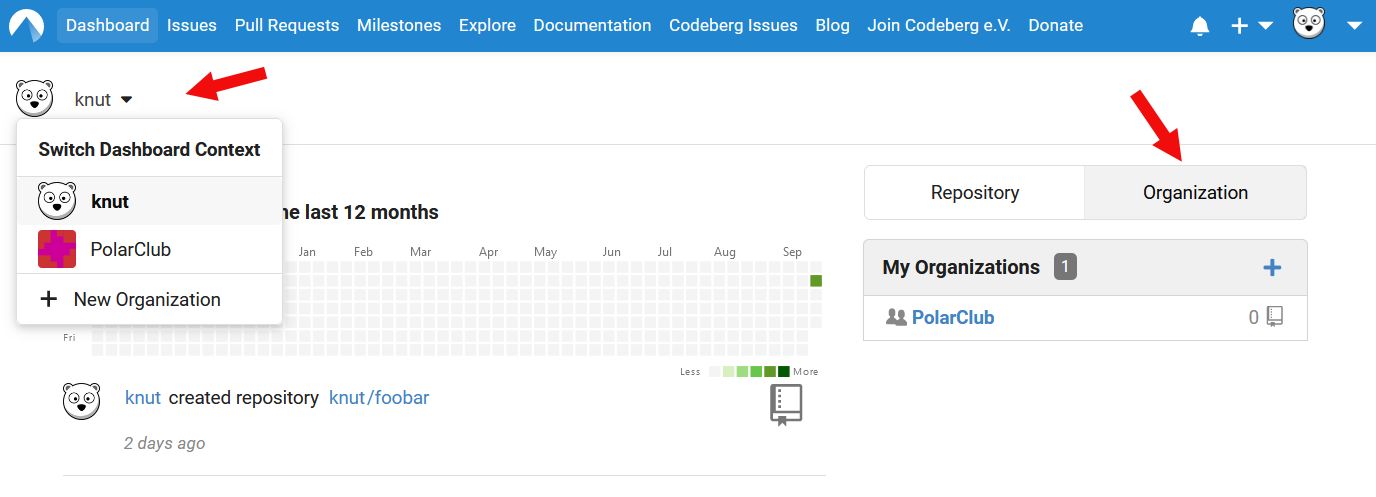
Switch between your personal account and the organization
On the dashboard, click on the avatar on the left and select the context (personal account or organization) you want to work with. Alternatively, switch between your repositories or your organizations tabs on the right side.
View organization
The organization's dashboard gives you an overview of the organization:
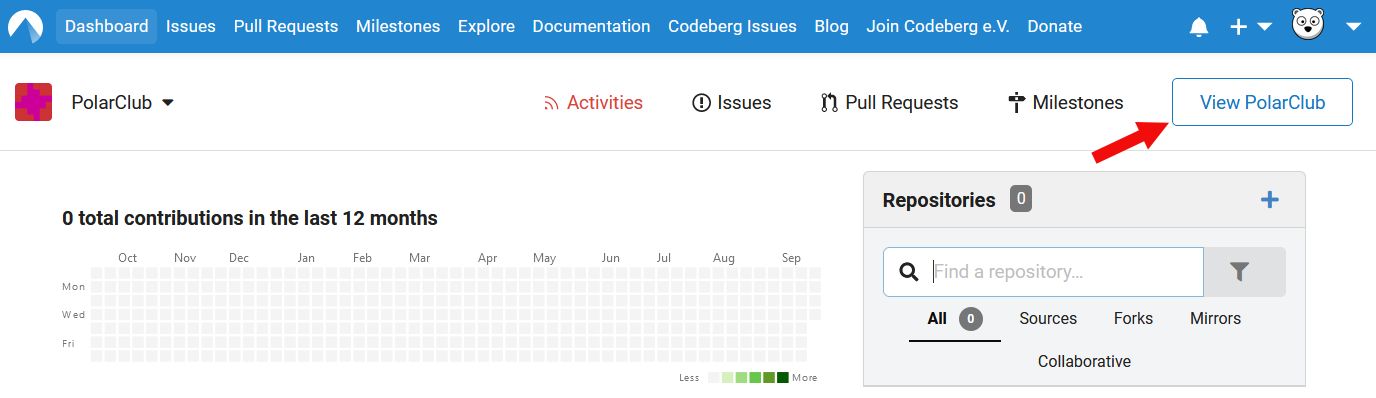
If you click on the View [organization] (here PolarClub, you'll be directed to the organization's page:

From here, you can access all repositories (there's currently none here) and create new ones.
There's a list of all the members (People) and teams; in this example, there is only one member (Knut the polar bear),
and one team (Owners) with one member (yourself) and no repositories.
Edit organization
The cog next to the organization's name will lead you to its settings:

This is where you can change general settings related to your organization, such as its name, avatar, website or visibility. You can also delete your organization, and access more advanced settings like organization webhooks:
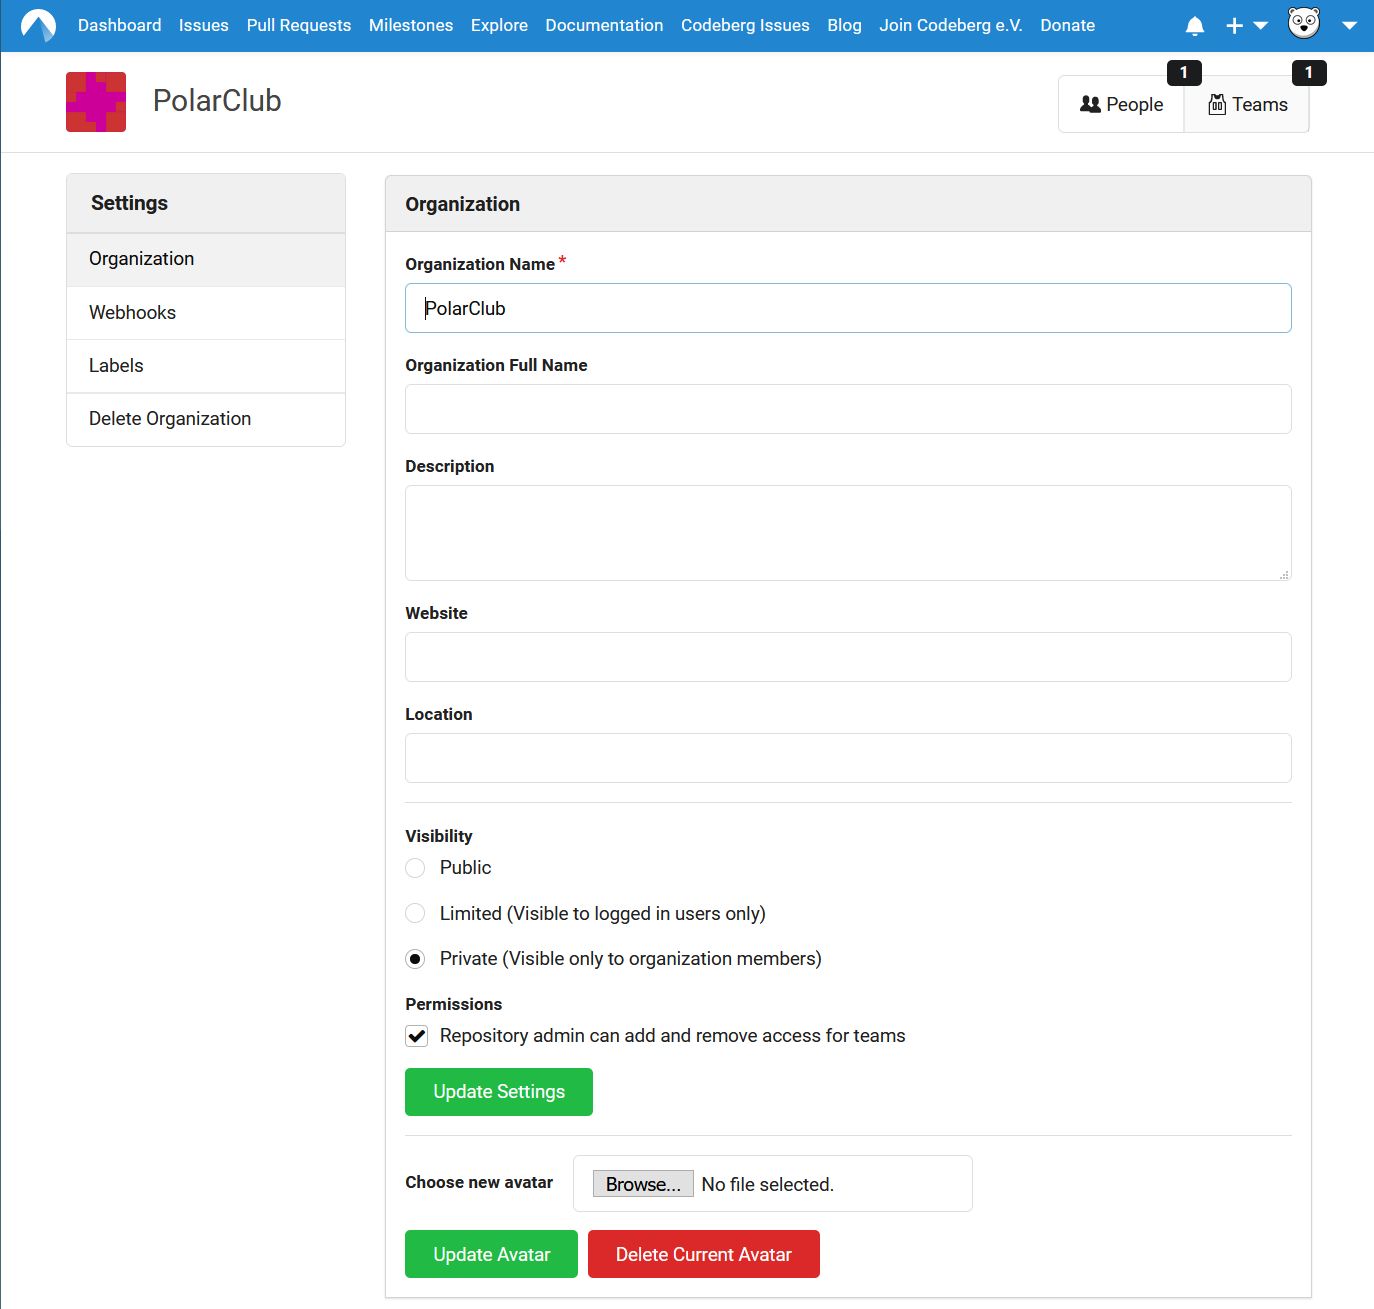
The Name of the organization is the name that will define the URLs of the organization and of all its repositories.
On the other hand, the Full Name is the name that will appear on the organization's home page.
In the Labels tab, you can create labels that will be used across all repositories of this organization.
This will help with issues and pull requests. The default label set is a good starting point.
In the top right corner, you have access to the members and teams of your organization. These can also be accessed from the organization's page.
Teams
The Teams tab gives you an overview of all the teams, their members and their number of repositories.
You can also join a team from here if you have the permission to do so:
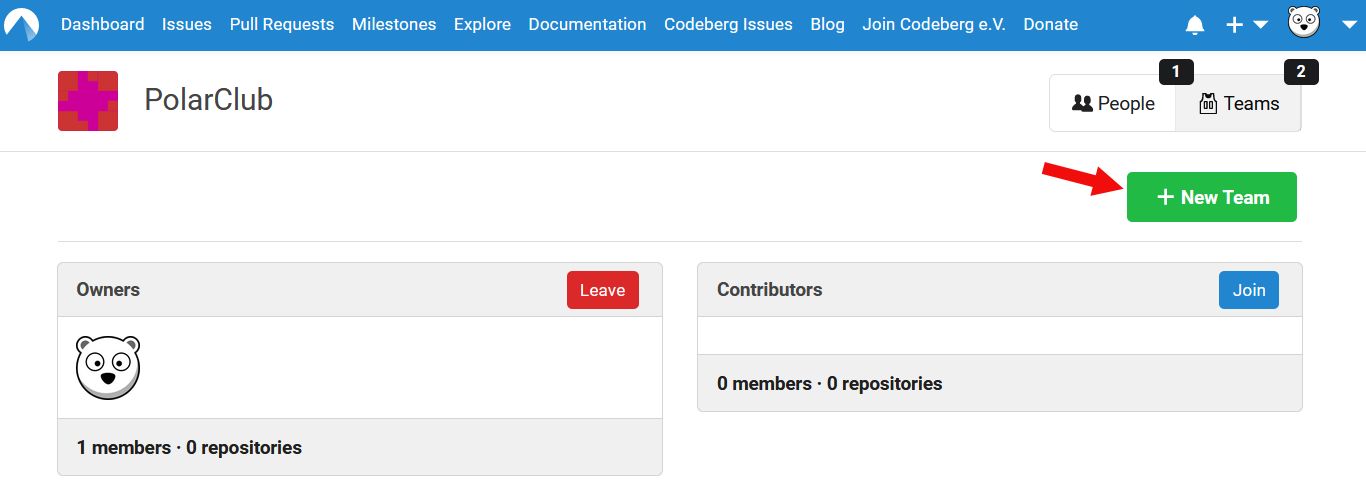
When you create an organization, a team Owners is created and you are automatically added to this team.
Members of the Owners' team have all permissions (see Access rights below for details).
Click the + New Team button to create a new team. Now, in the new page, you can set its name, permissions,
and accessible repositories.
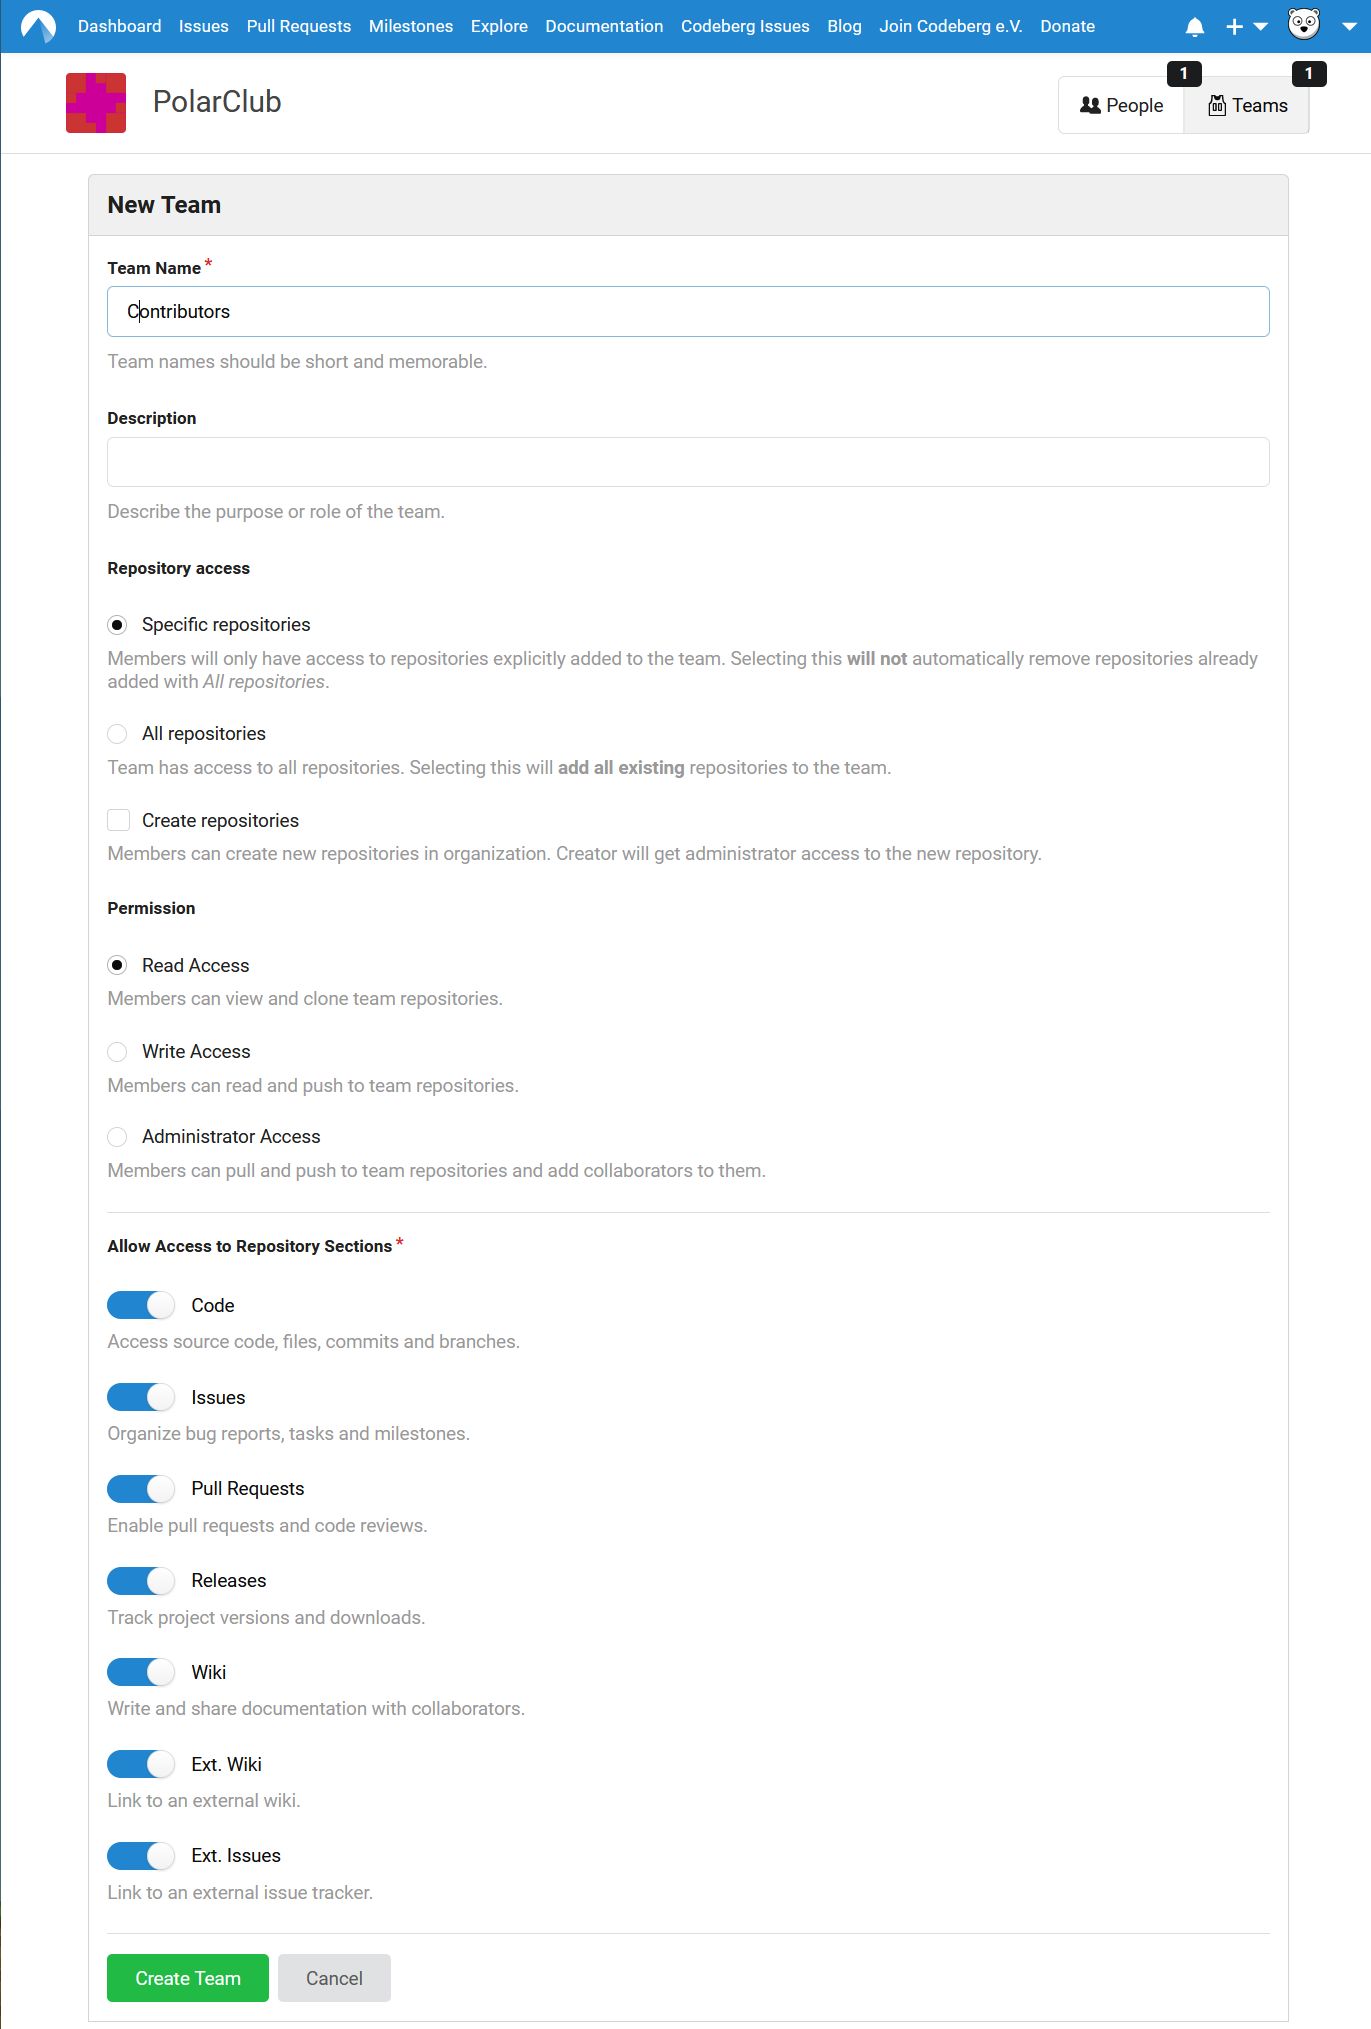
You can choose whether members of the team can only access some repositories explicitly added to the team, or whether
they can access all repositories of the organization.
You can also allow members to be able to create new repositories on behalf of the organization.
If you have allowed repository administrators to grant or remove access for teams (see Create an Organization
above), they can do so in the Settings → Collaborators tab of the repository.
If you allow either Read or Write access, you can additionally set which sections of the repositories
(code, issues, pull requests, releases and wiki) the members will have (read or write) access to.
On the other hand, Administrator Access automatically grants read and write access to all sections;
this part of the page is hidden in this case.
See the section Access rights below for details.
If you belong to the team Owners, you can edit teams.
To do this, go to the Teams tab and click on the team you want to edit:

Click on Settings to edit the team as shown above for the creation of a team.
This is also where you can add or remove members to/from a team, and assign repositories to them.
It is also possible to invite people by email.
This also works for email addresses not associated with any Codeberg account, in which case they
will be prompted to create an account first.
Access rights
An overview of the repository permissions is given in the article Repository Permissions.
Members of the "Owners" team can do everything that admins can do. However, only owners of the organization can manage the organization, which includes:
- edit/delete the organization,
- add/remove members and teams,
- define access rights of teams,
- edit organization repository settings in the danger zone (i.e. transfer ownership, delete wiki data and repository, and archive repository).
When owners allow members of a team to be able to create new repositories for the organization (see box "Create repositories" in Teams settings), the member who creates the repository will be added as a collaborator with administrator rights to this repository (see Invite Collaborators for details).