Webhooks can help you to automate working with your repository. For example it can trigger an defined action if someone pushes to your repository or opens a new issue by using a target web URL.
Detailed documentation on how to use webhooks can be found in the forgejo Documentation.
The following paragraphs will give concrete examples on how to use webhooks with some services.
Currently, Codeberg offers implementation templates for the following services:
- Forgejo
- Slack
- Discord
- DingTalk
- Telegram
- Microsoft Teams
- Feishu
- Matrix
- WeCom
- Packagist
Every service that offers webhook functionality can be added using the Forgejo template using the webhook URL provided by the service.
Using Read the Docs
To better illustrate how webhooks can be used, we prepared a tutorial for you that works with *Read the Docs. In this example, we will show you how to build your documentation every time that a new commit is pushed to your Codeberg repository.
-
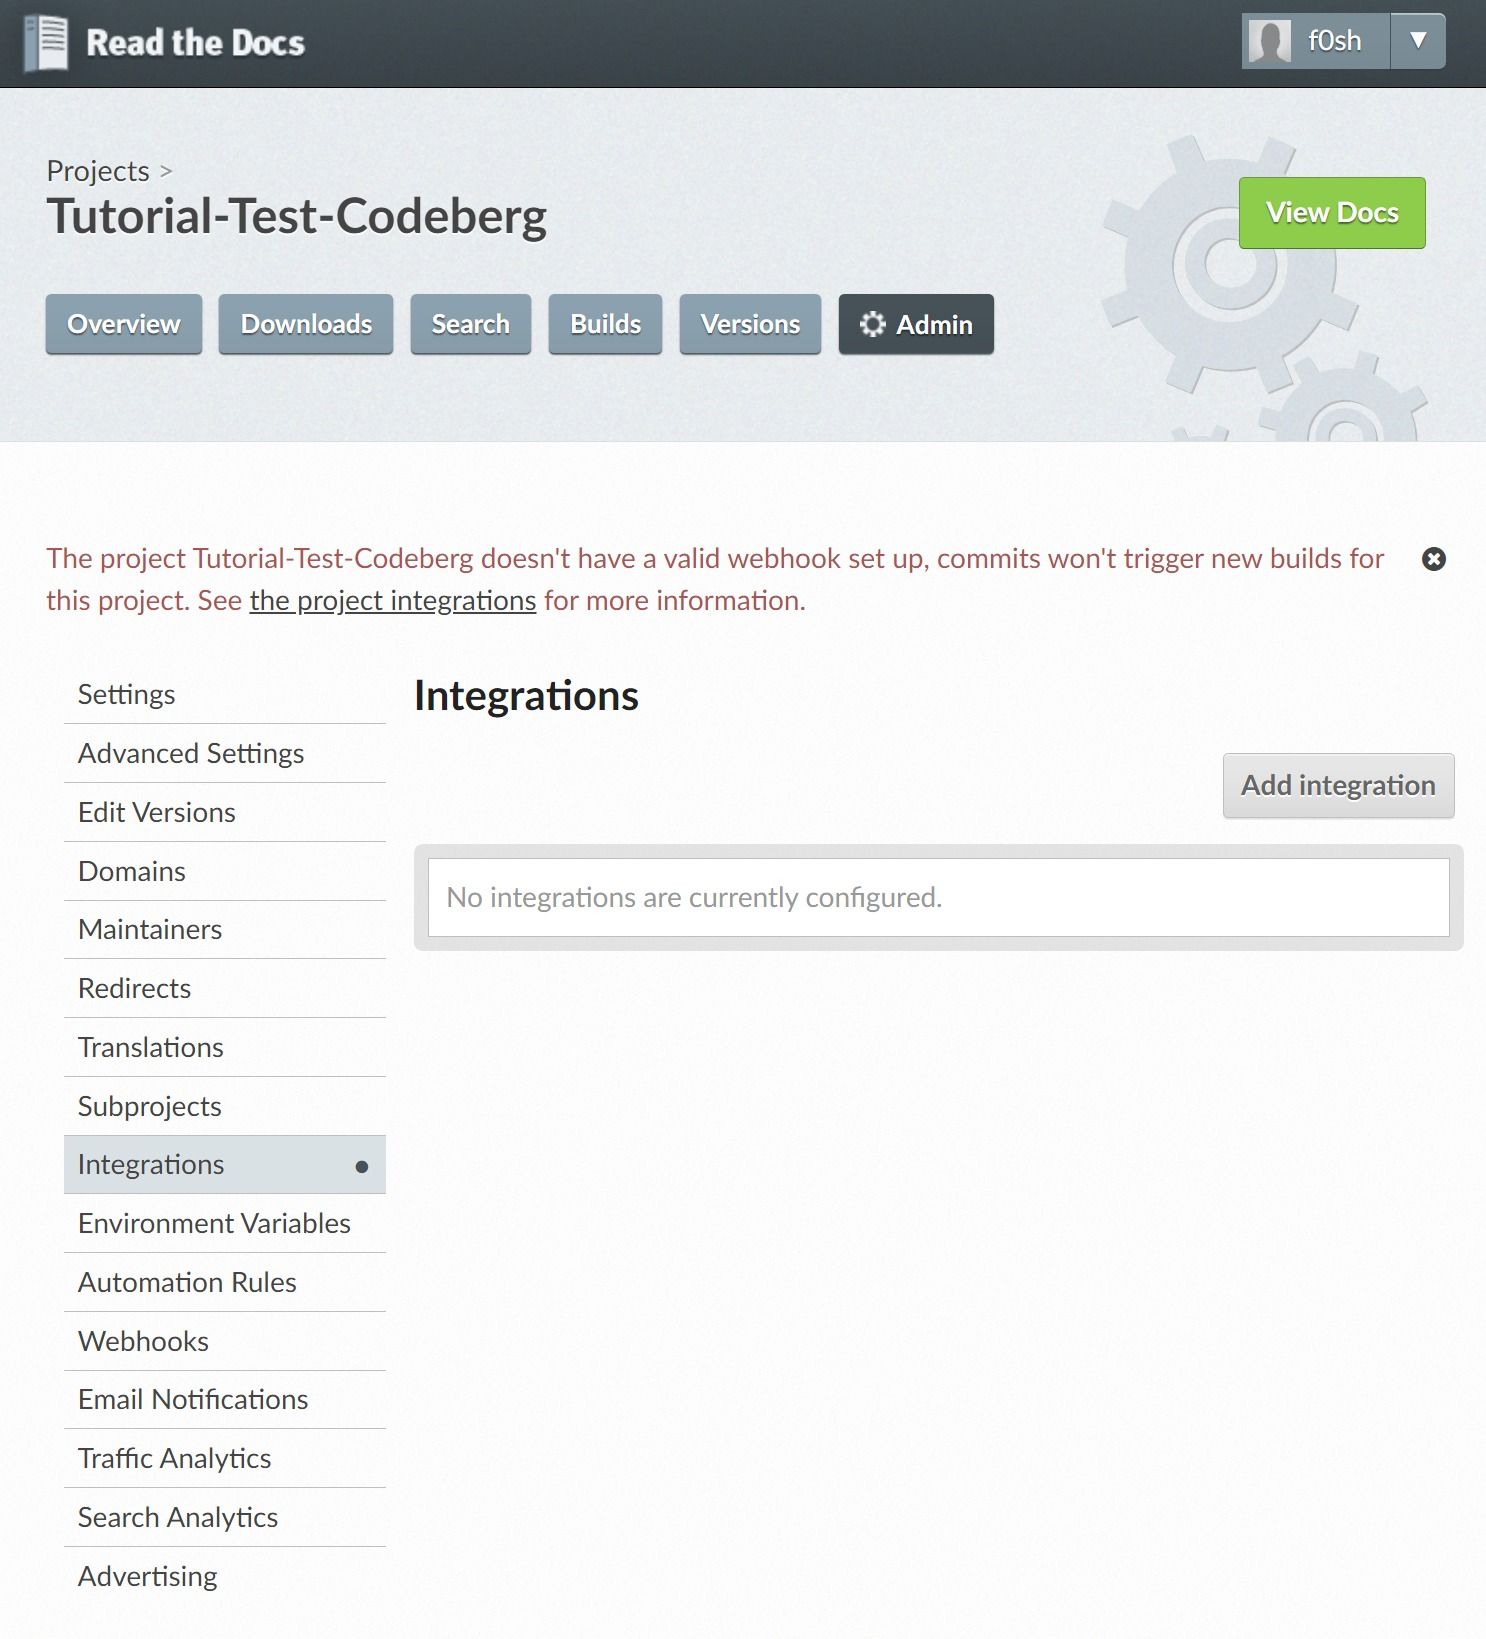
Login into your Read the Docs account and select the project you want to add a webhook to.
-
Click on the Admin button.
-
In the left side menu, click on Integrations.
-
Click on the button Add Integration.
-
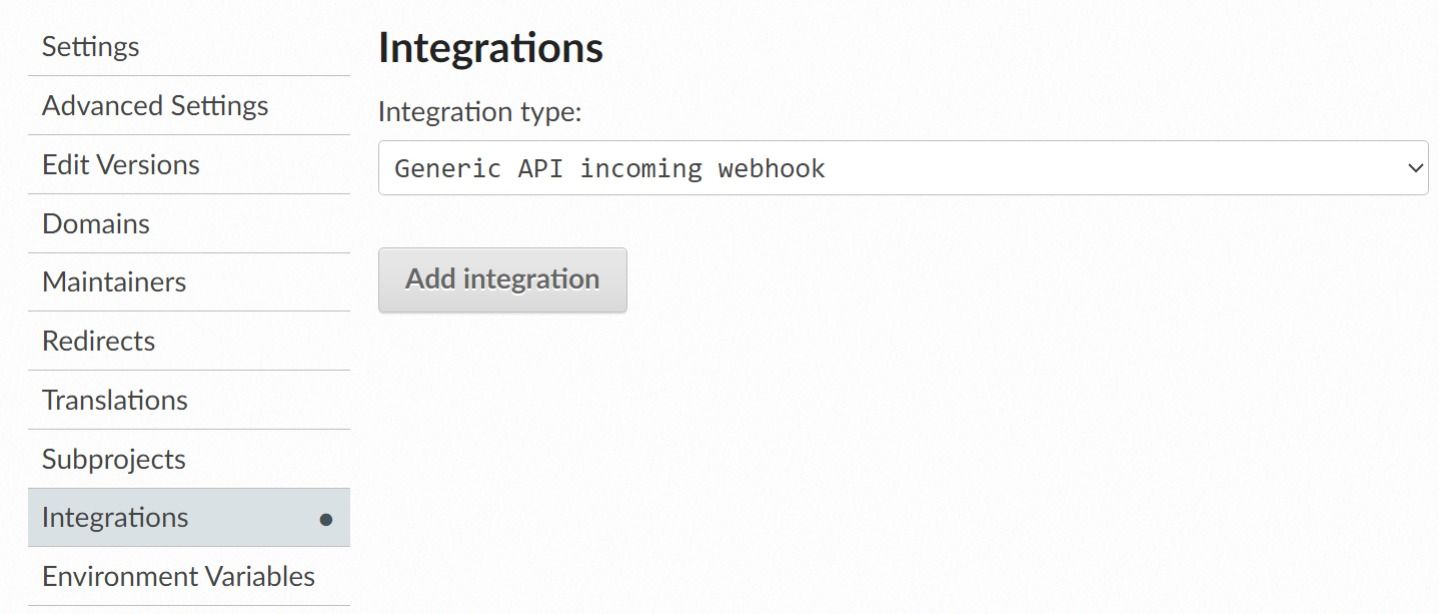
Select GitHub incoming webhook. (GitHub, GitLab or BitBucket incoming webhooks, all work equally well and generate the needed webhook URL)
-
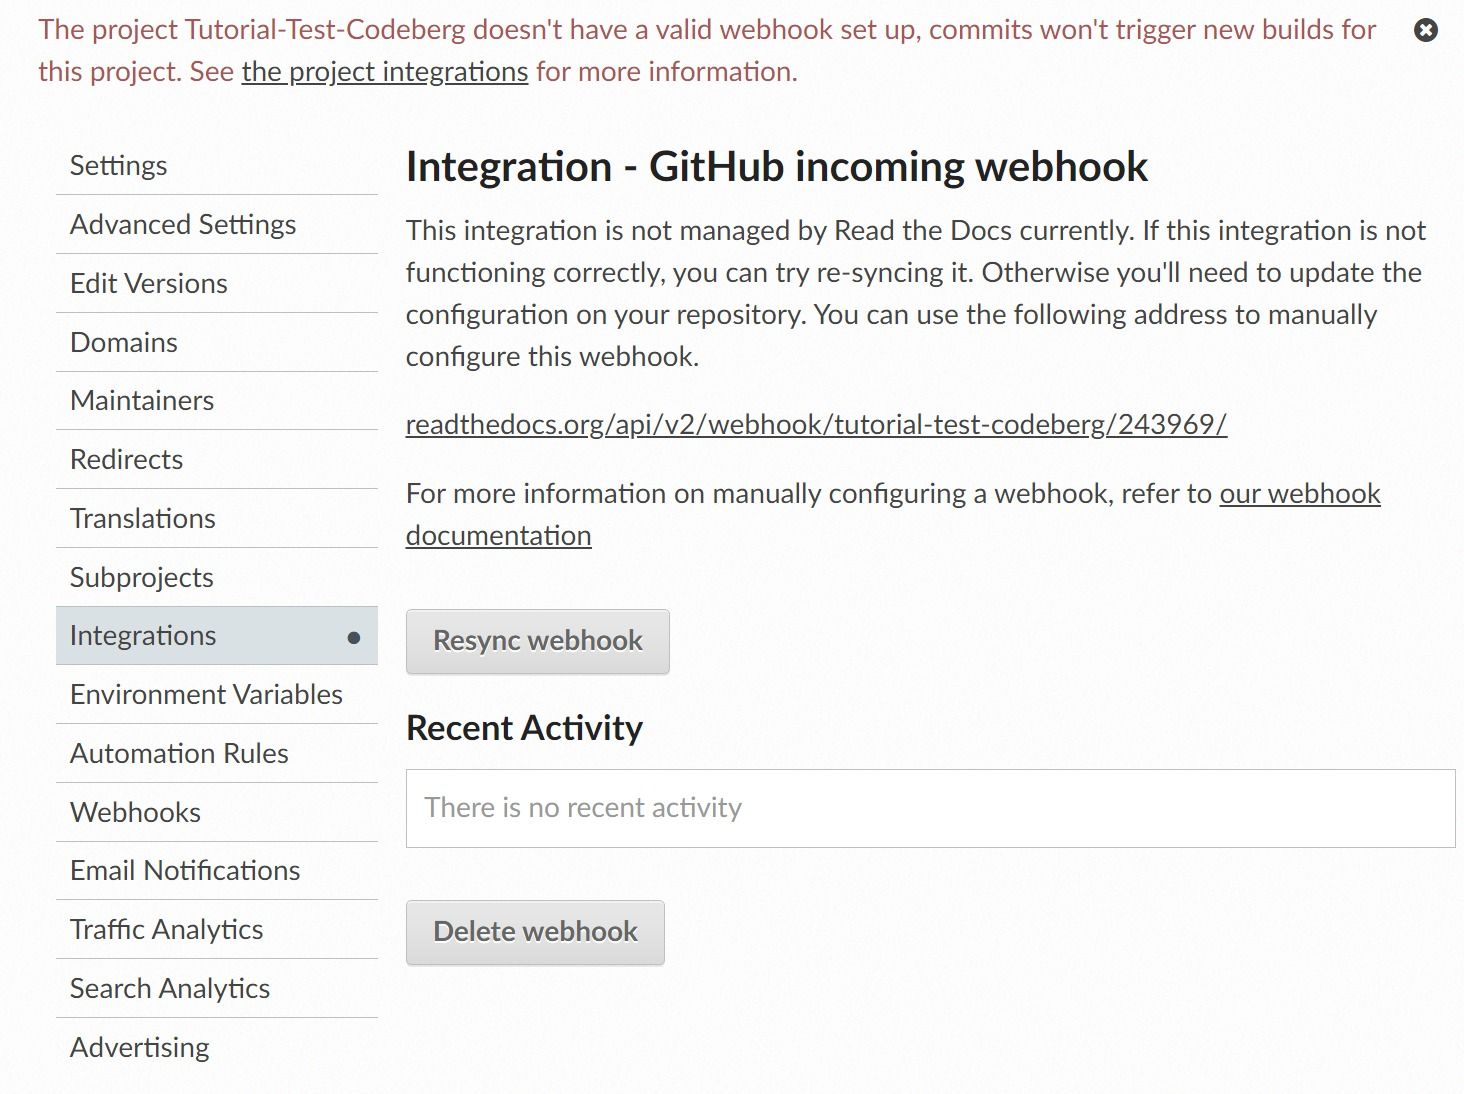
A webhook address will be displayed to you. Write it down and keep it safe!
Now go to your Codeberg repository.
-
Go to your repository and click on Settings.
-
In the top menu, click on Webhooks.

-
Click on Add Webhook and choose Forgejo.
-
Paste the webhook address provided by Read the Docs into the Target URL field.
-
You can select when the webhook should be triggered using the Trigger On setting. For illustrative purposes, we will select Push Events; this will trigger the webhook every time that someone pushes to your repository.
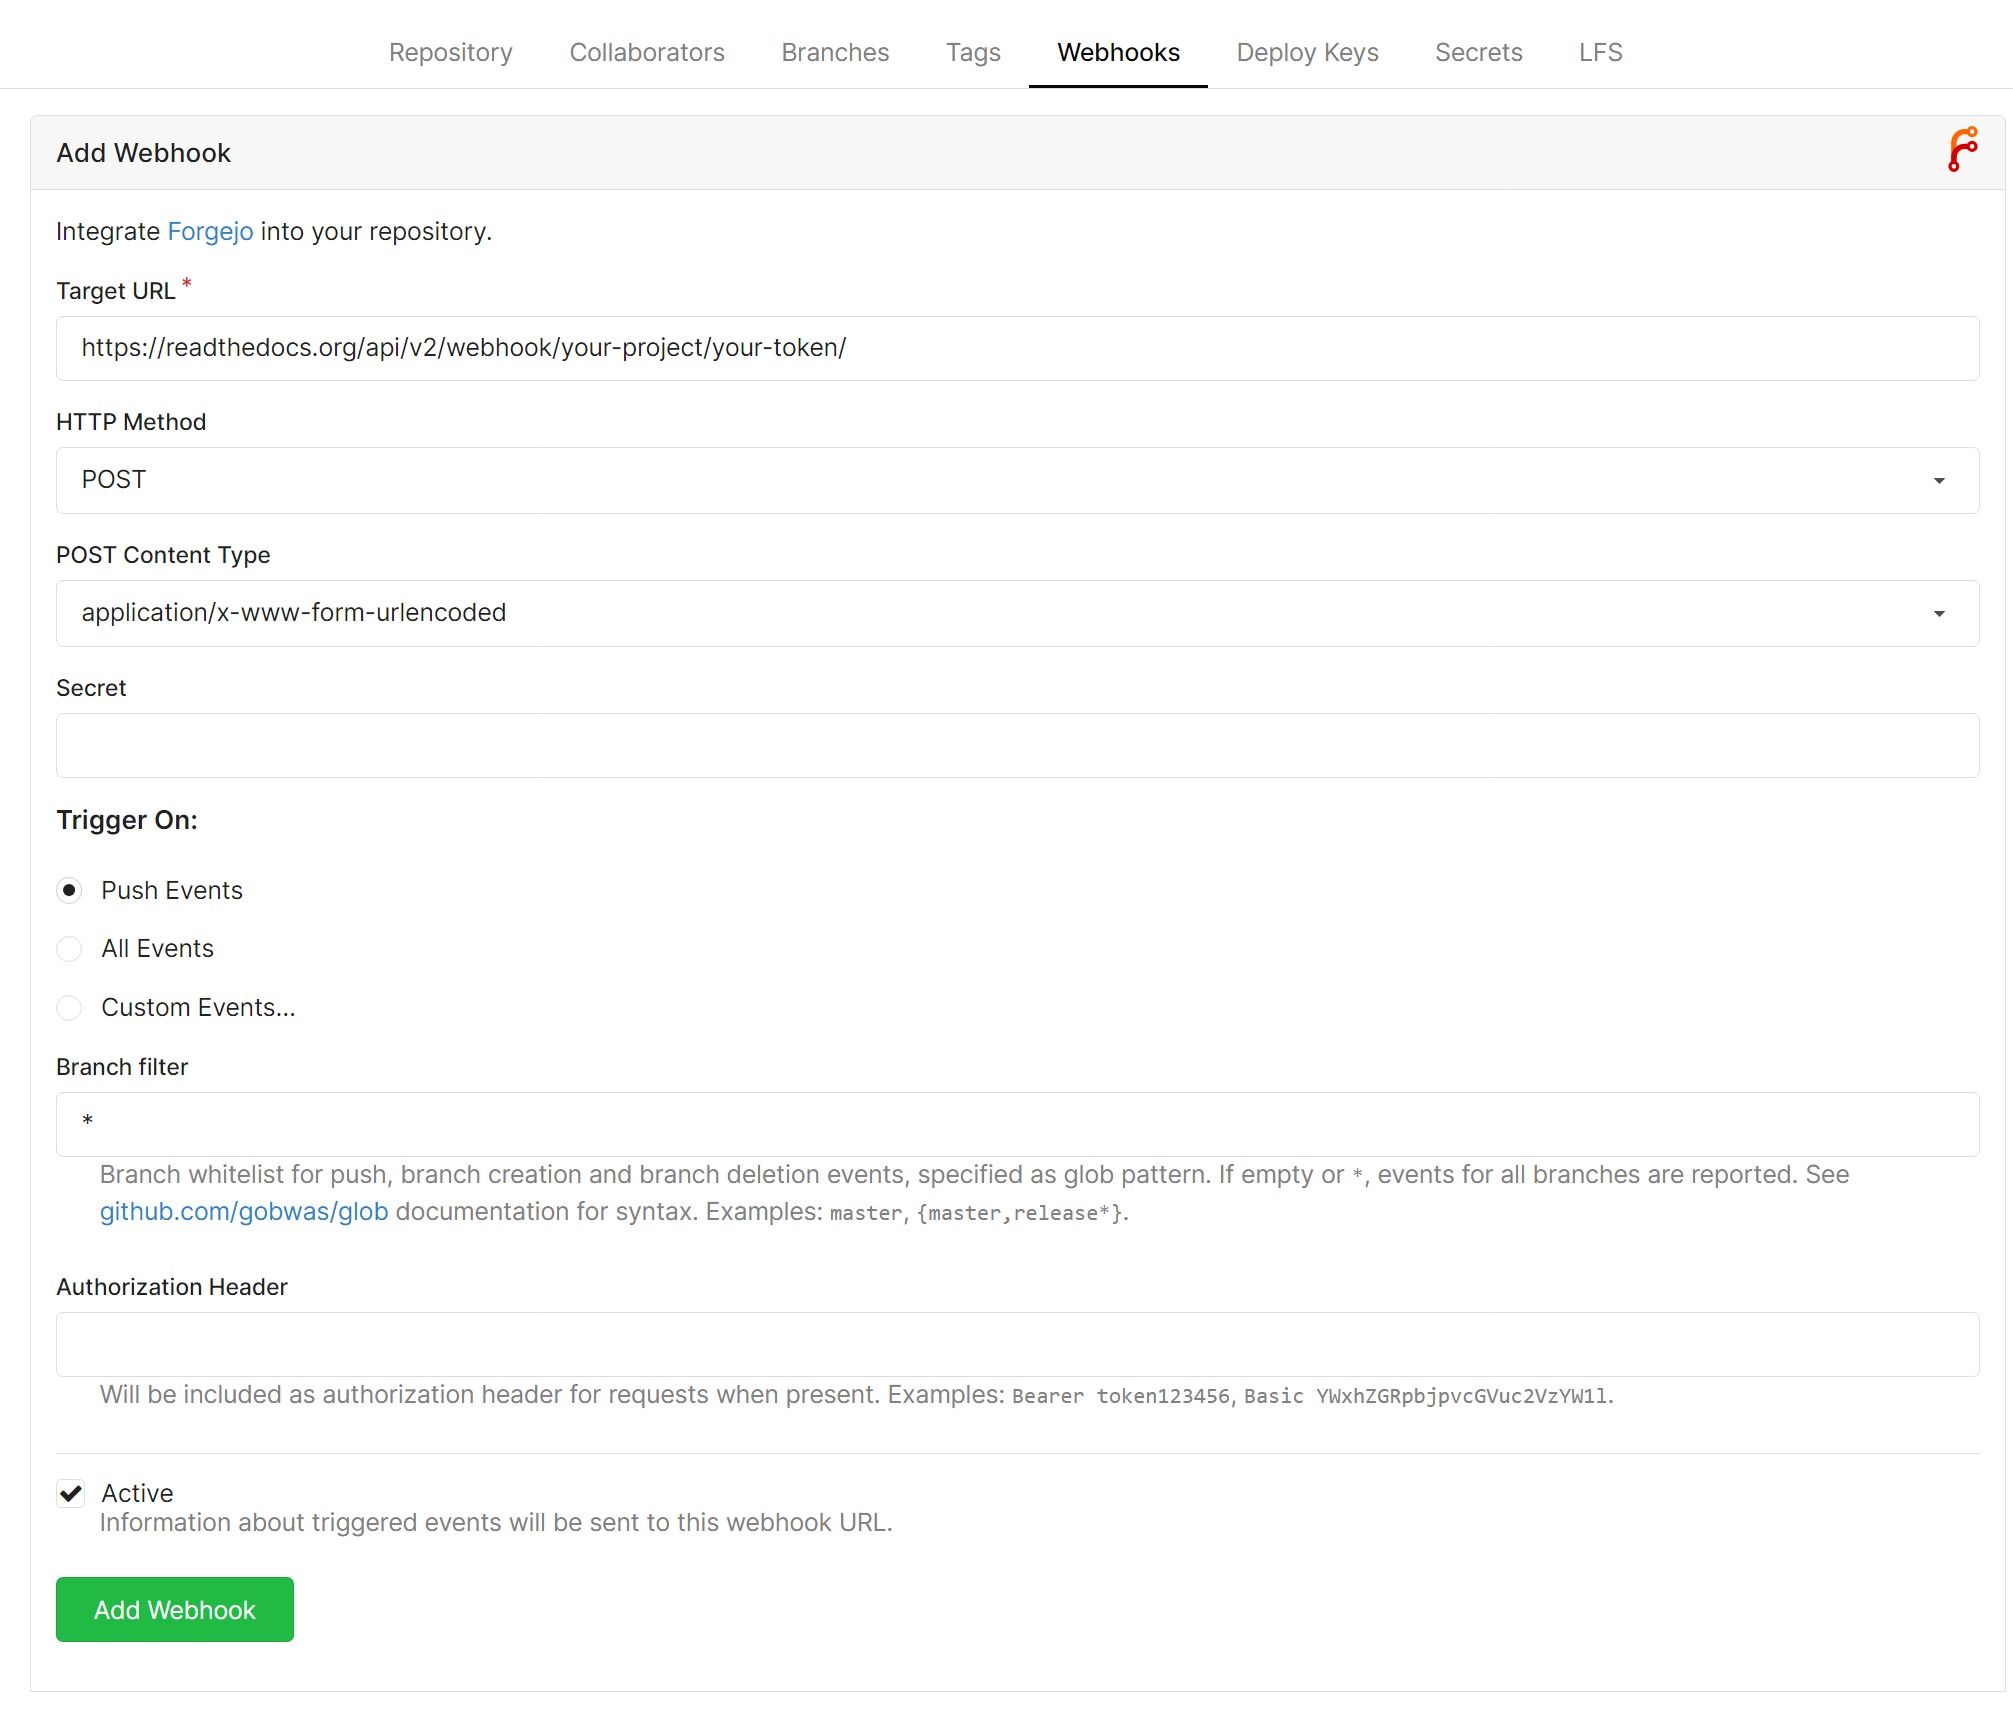
In this example, we do not need to use any other fields to make the webhook work. For your personal reference, here are some explanations as to what these other fields do:
- HTTP Method: Should be "POST" by default, so that the data is sent within the HTTP header
- POST Content Type: specifies how the data should be sent in the header. "application/json" and "application/x-www-form-urlencoded" both work with Read the Docs
- Secret: For authentication reasons, you can send a secret. For ReadTheDocs leave it empty.
- Branch filter: You can define, that the webhook is only triggered on certain branches in your repository
- Authorization Header: Some services need an authorization to call the webhook
Once you're done, you can click on Add Webhook to add the webhook to your repository. Now, whenever something is pushed to your repository, the webhook will trigger and your Read the Docs documentation will be rebuilt.
You can confirm that everything is working as it should by selecting the webhook that you just created and clicking on the button Test Delivery, which will manually trigger your webhook.