This article will guide you on how to integrate Weblate with Codeberg.
Projects and Components
The first thing you might notice, is that Weblate has projects and components.
A component is something that can be translated e.g. a software or a documentation. A project is a collection of components that belong to the same thing, e.g. you have a software and the corresponding documentation. So you add a project for your software and one component for the software itself and another one for the documentation. In simple cases you only need one component in a project.
Create a new project
On Codeberg Translate log in with your
Codeberg account. Now click on "+" and select "Add new translation project".
Now just enter some metadata such as the name, the URL slug (your project
will live under the URL https://translate.codeberg.org/projects/<your slug>), the link to the website (if you don't have one, just use the URL of
your Codeberg repo) and some instructions, how this project should be
translated (can be empty). This are just metadata. They have no meaning,
when you connect to your Codeberg repo later. Click on "Save" and you are
done.
Add a component
You now see your new project with no components at all. Now let's add a component.
-
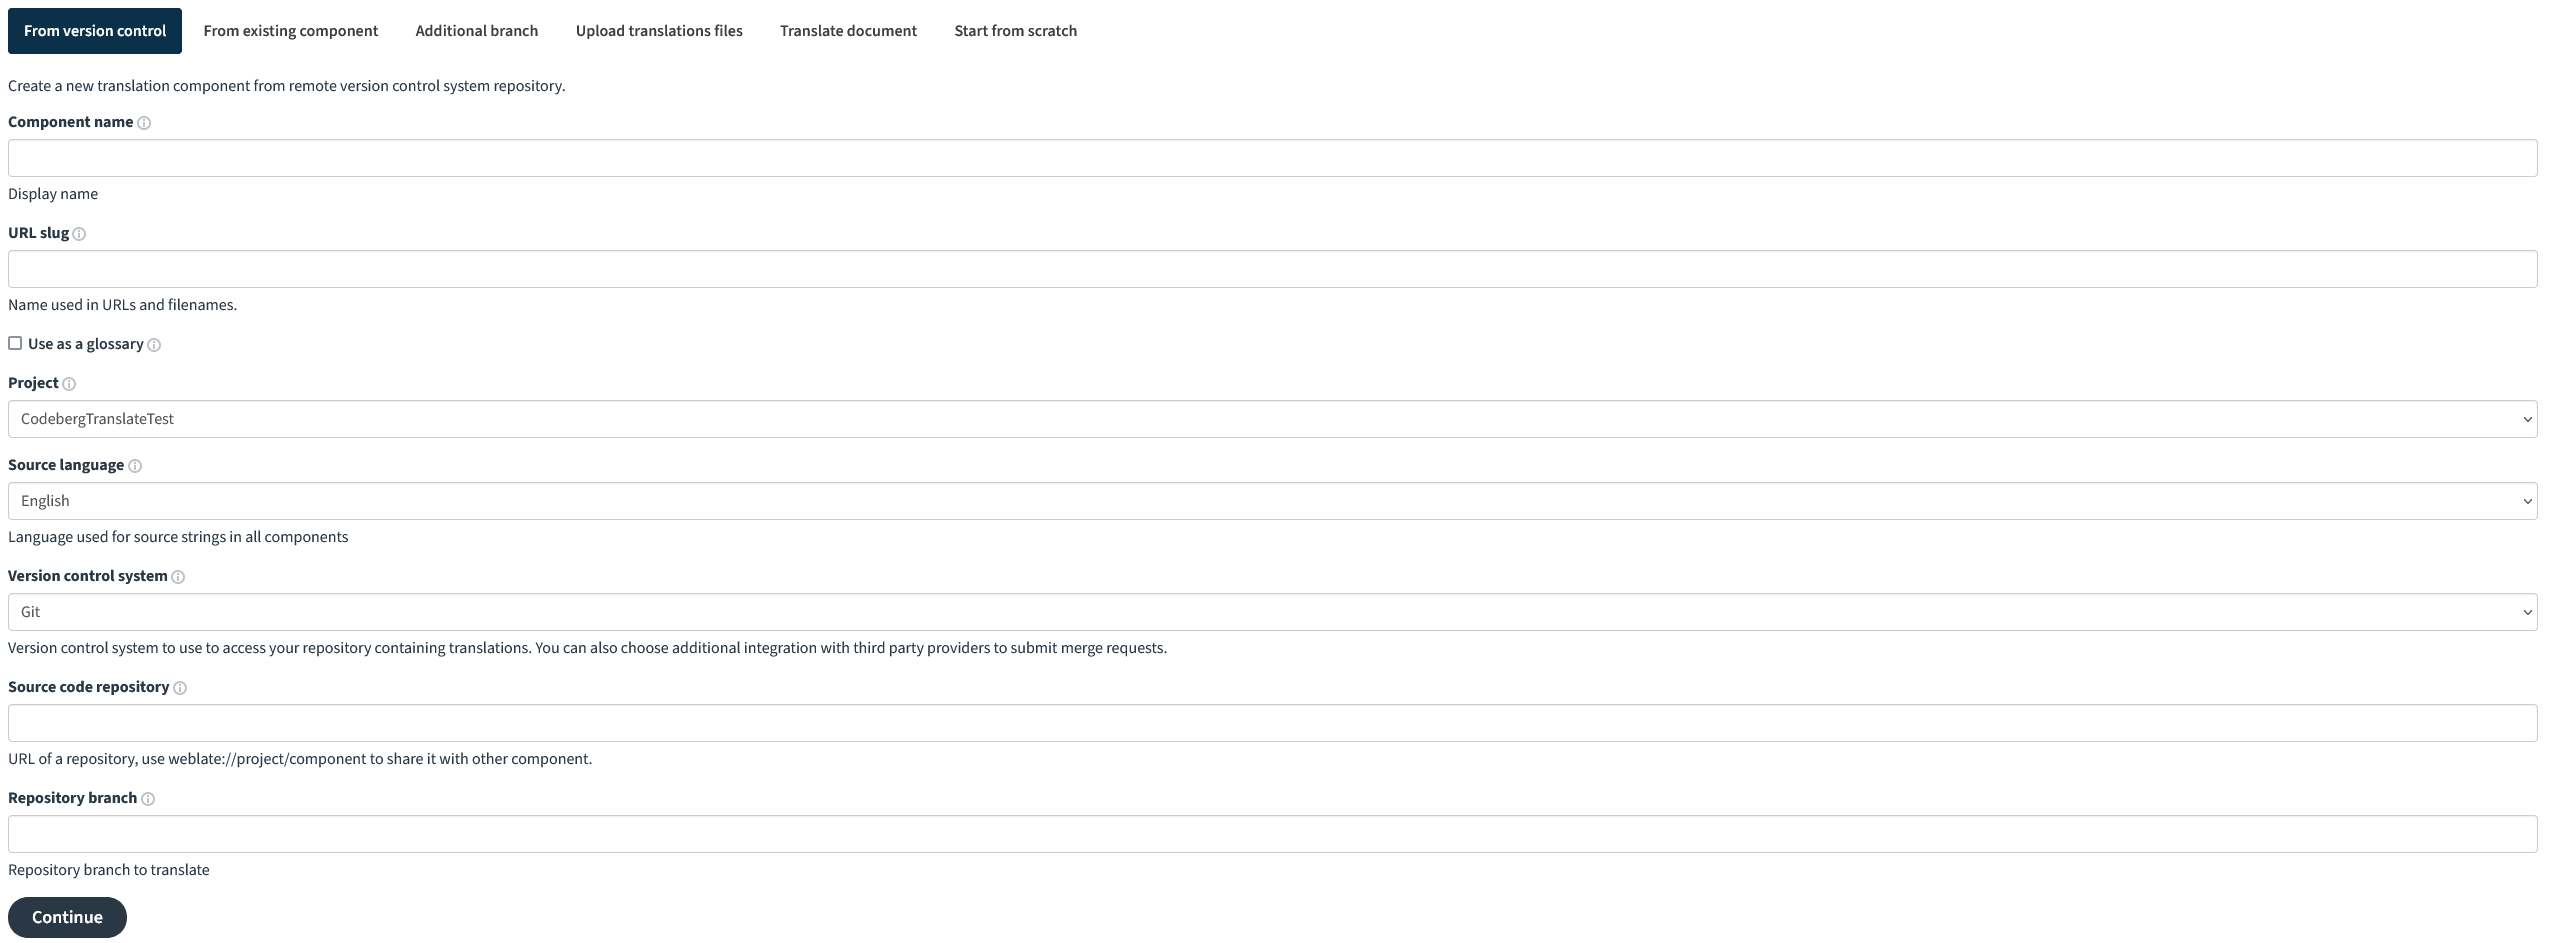
First click on the "Add new translation component" Button. You should see this page.
-
Now enter the following:

- Name: The name of your component. You can choose freely.
- URL slug: The URL, you can find your component
(
https://translate.codeberg.org/projects/<your project>/<your component slug>) - Source language: If the source language of your project is not English, select it here.
- Source code repository: The URL to your Codeberg repo
e.g.
https://codeberg.org/Codeberg/Documentation. If you already have a component, that uses this repo, useweblate://<project>/<component>to link it with the existing component instead.
Leave the rest as it is and click "Continue". Weblate will now scan your repo and you should see something like this:

Weblate has searched your repo for common translation structures and presents to you what it has found. If you select one of the suggested structures, Weblate will set some settings automatically. You can change them later or fully configure the component manually (visit Manual component configuration for more details). Please note, that one component only works with one translation system in one directory. If you have multiple, you need to add multiple components.
Commit translations to Codeberg
After setting up a component of your project in Weblate, you have to configure how Weblate should interact with your underlying repository to feed the translations to it. The following two options are the most common ones:
-
If you want to proceed such that Weblate will open Pull Requests with translations to your repository, you should select "Gitea pull request" under "Version control system".
-
Alternatively, you can setup Weblate to push translations directly into your repo by selecting "Git" under "Version Control". Set the "Repository push URL" to the SSH URL of your git repo (
git@codeberg.org:<your user>/<your repo>.git) and (optionally) specify the branch Weblate should push to under "Push branch". For Weblate to be able to push directly to your repo, you must add thetranslateuser as a collaborator in your Codeberg repo under "Settings > Collaborators".
To finalize the Weblate setup, select a translation license and click "Save".
Now, your Codeberg repo might change while your translators are
working on the translations via Weblate. To make sure that your
Weblate repo is in sync with the Codeberg one, open your repo settings
in Codeberg and go the Webhooks. Now click "Add Webhook" and select
"Gitea" from the drop down. Under "Target URL" enter
https://translate.codeberg.org/hooks/gitea and click "Add
Webhook". Now Codeberg will notify Weblate about changes in your repo,
so it will be automatically updated.
At last you can share the link to your Weblate project with all your translators.
By default, Weblate will periodically (24h) create a PR or commit directly to your Codeberg repo. To commit the translations from your Component to Codeberg manually, go to your Component > "Manage" > "Repository Maintenance" and click on "Push".