Why two-factor authentication?
While it is important to have a strong password for extra security, it is a good idea to configure two-factor authentication for your account in case your password or device ever gets compromised.
With two-factor authentication, you will be asked for an authentication code generated using your phone in addition to your password when logging into Codeberg.
That way, your account cannot be compromised even if your password gets compromised, as long as your phone stays safe.
How to set up two-factor authentication
TOTP
Prerequisites
You will need an authenticator app installed on your phone.
If you don't already have an authenticator app and you're not sure which app to use, have a look at Aegis Authenticator (F-Droid | Google Play Store), Authenticator (App Store) or Ente Auth (F-Droid | Google Play Store | App Store).
Step 1: Navigate to your user settings
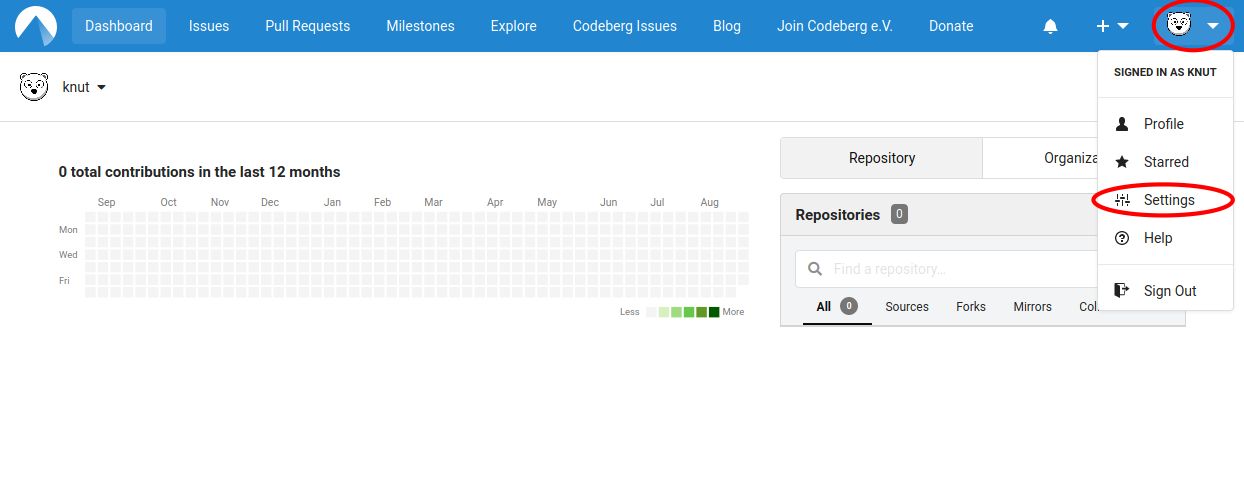
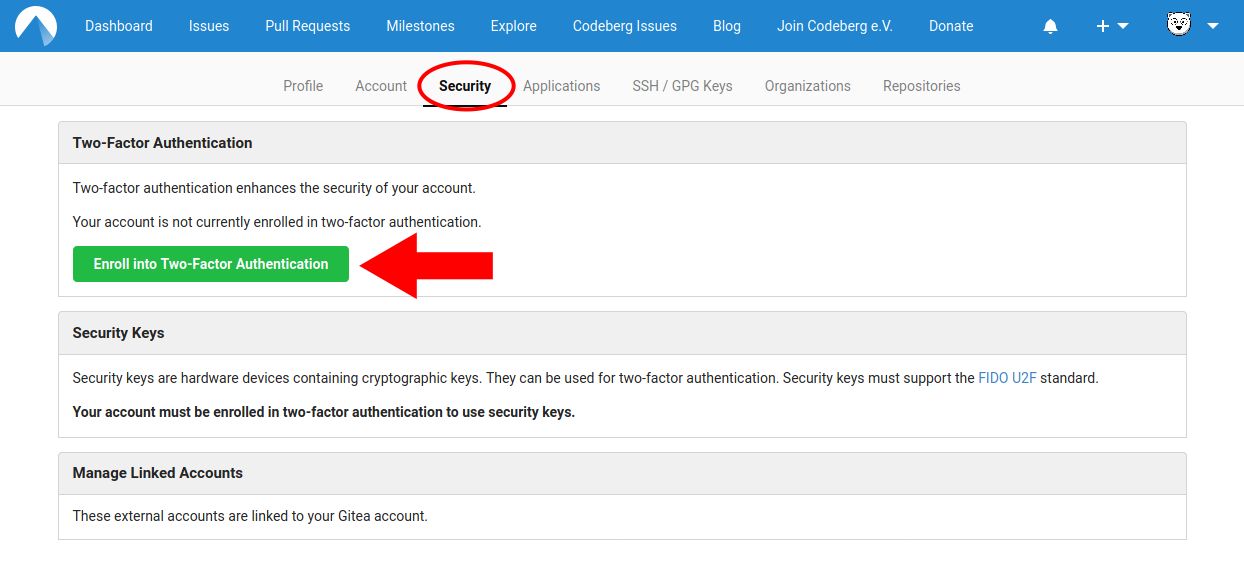
Step 2: Navigate to the Security tab and click on the Enroll button
Step 3: Scan the QR code and enter the verification code
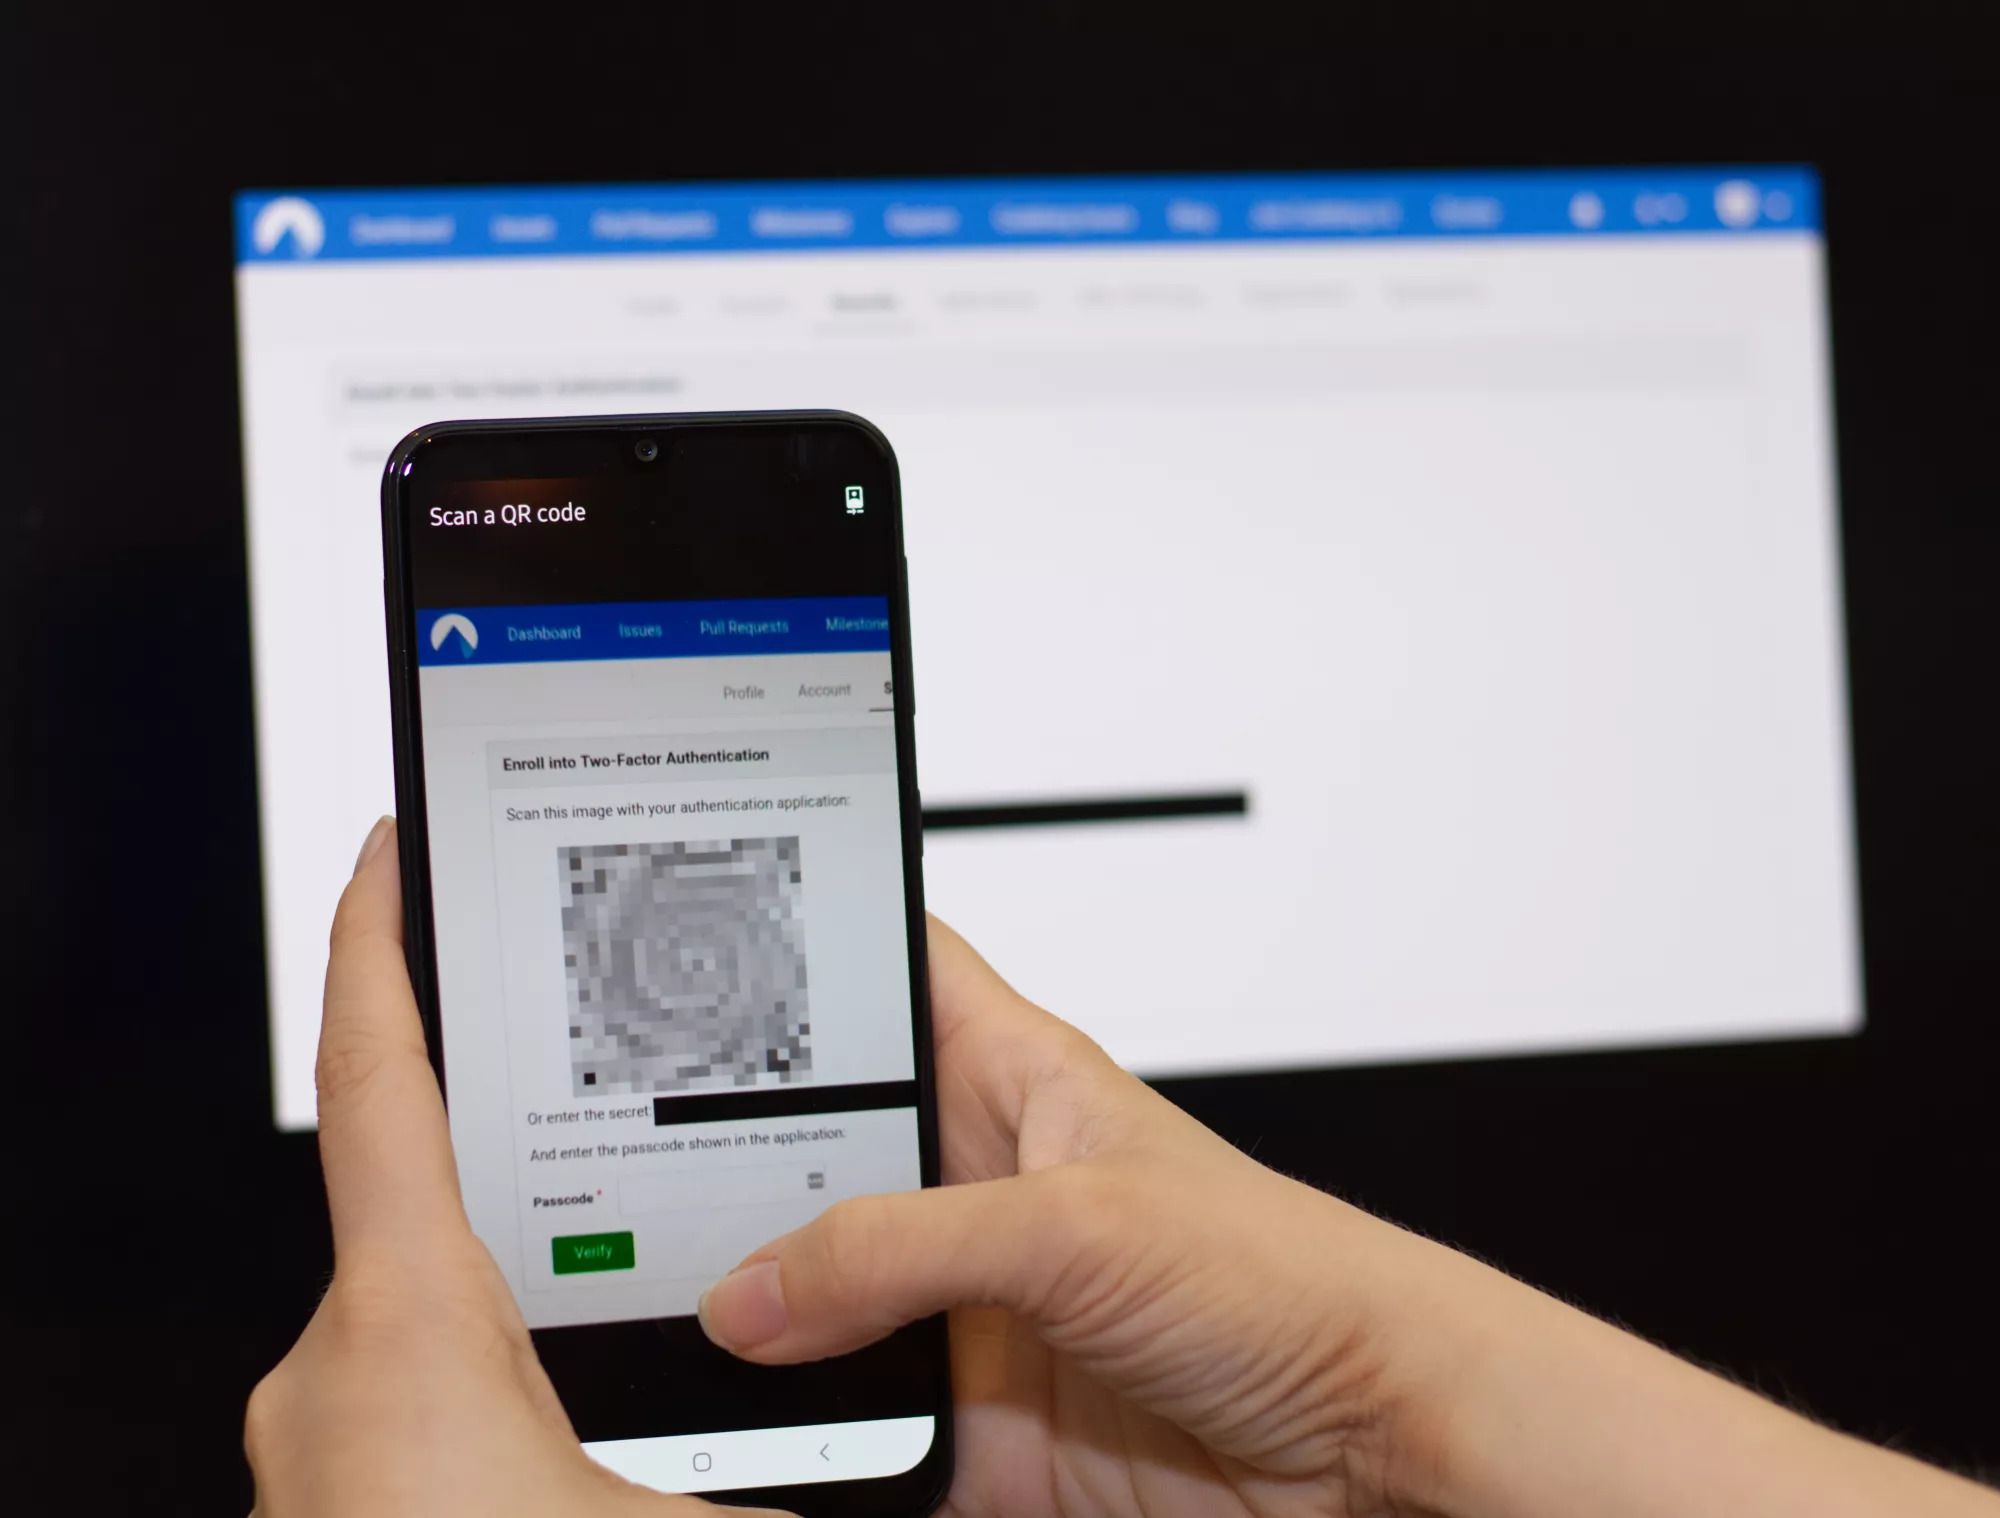
After scanning the QR code with your app, enter the six-digit code displayed in your app into the "Passcode" field of the settings form, then click "Verify".
Step 4: Store your scratch token in a safe place
If your phone ever breaks, gets lost or gets stolen, you can recover your account using the scratch token.
This is shown to you right after setting up 2FA:
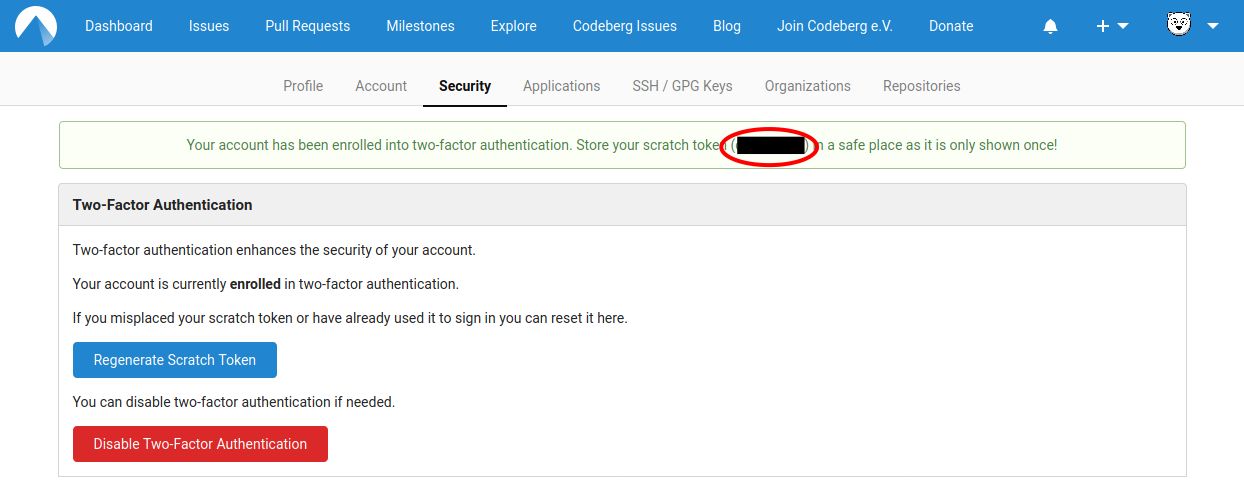
Please store this token in a safe place.
Step 5: Done
That's it - you have now configured two-factor authentication for your account.
From now on, each time you log into Codeberg you will be asked for an authentication code from your app, adding an extra layer of security over just using a password.
WebAuthn
If TOTP is configured, you can also add security keys to your account. These security keys are hardware devices that securely store cryptographic keys. They are either integrated on your device, like some phones' fingerprint scanners, or connect to it via USB or NFC.
While you'll be able to recover access to your account using TOTP if your key breaks, if you can, you should add at least 2 security keys.
Step 1: Navigate to your user settings
Step 2: Go to the security tab and locate the Security Keys section
Look for Security on the list of settings.
The Security Keys section should be right under the Two-Factor Authentication section where you configured TOTP.
Step 3: Give your key a nickname
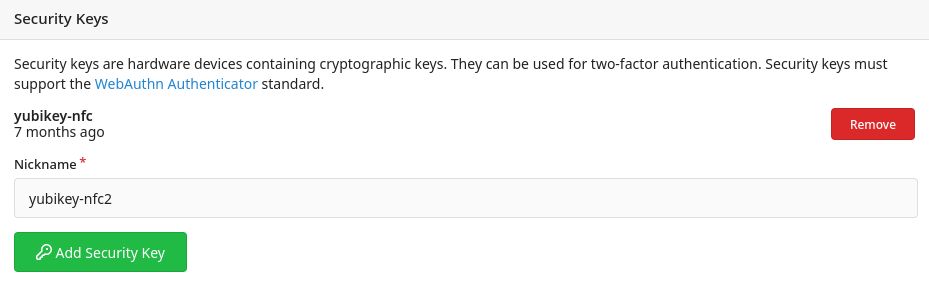
Choose a nickname for your key and input it on the Nickname input.
Step 4: Follow your browser's instructions
Once you've decided on a nickname, click Add Security Key right under the Nickname input and follow your browser's instructions.
Step 5: Done
WebAuthn is now configured for your account! Now, when you sign in, you'll be given a choice between using TOTP or WebAuthn.
You can very likely use your WebAuthn security key to secure your SSH key, learn more about this on Adding an SSH key to your account).
Personal access token
If you push to Codeberg via HTTP (see Clone & Commit via HTTP), an extra step will be needed to create a personal access token. This token will replace your normal password (+ authentication code) on Codeberg.
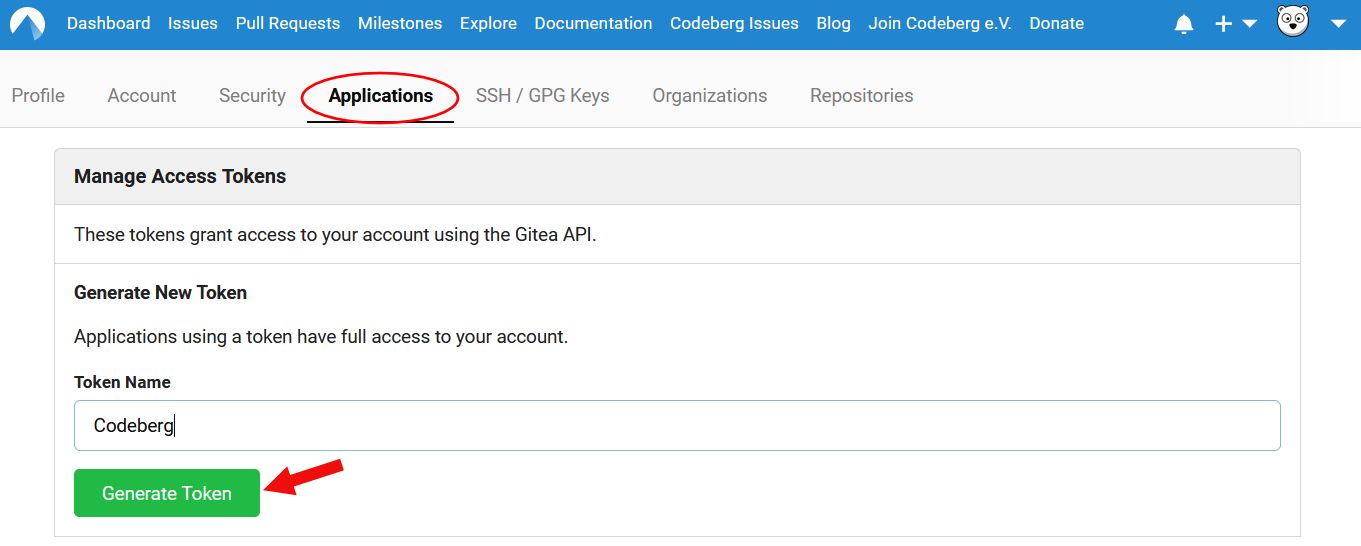
In your profile settings on Codeberg, go to the Applications tab.
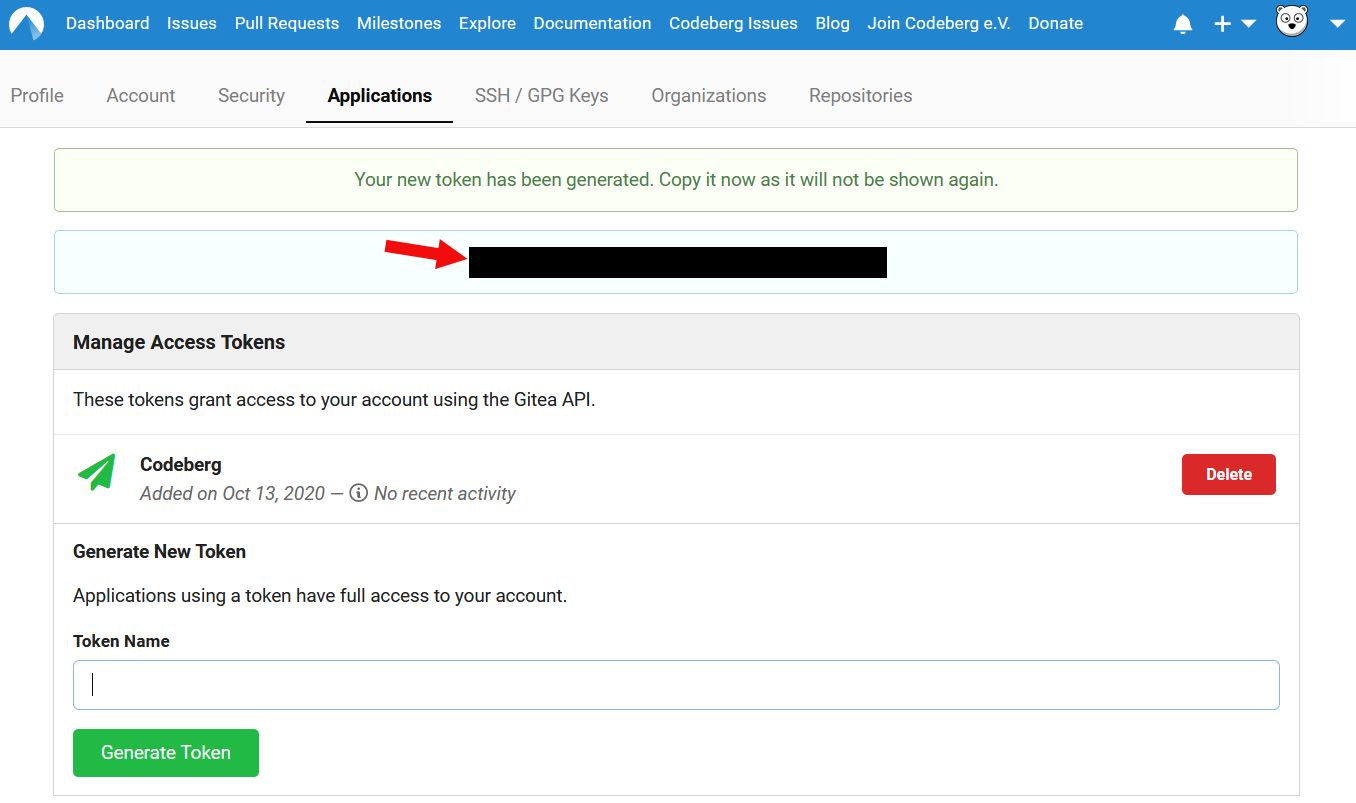
In the section Manage Access Tokens, add a Token Name and confirm by clicking on Generate Token.
Make sure you keep the generated token in a safe place, because it will not be shown again.
When asked for your password, just enter the token.
You can create as many tokens as you'd like: one for each computer, one for each Git client, one for each session...
you decide! You can also revoke tokens at any time by pressing Delete next to the token (see previous screenshot).
Configure Git with 2FA
If you want to clone a repository using the Git CLI and 2FA enabled, you have two choices:
- use
SSH: you do not have to do any special configuration, just use your ssh_key to login - use
HTTPS: for the login you use your username and your generated access token as a password. First time you enter it, it will be saved for your repository.
$ git clone https://codeberg.org/username/repo.git
Username for 'https://codeberg.org': username
Password for 'https://username@codeberg.org': access-token
If you want to permanently save your generated access token you can use the following command to store it globally on your computer:
git config set --global credential.helper cacheTroubleshooting
Codeberg's instance of Forgejo is using an OTP library to generate 2FA tokens and follows the RFC 6238 standard to generate TOTP which uses 30 seconds long time frames to accept your 2FA code.
  00:00     00:30     01:00
    v         v         v
    | <-----> | <-----> | <----->
        ^         ^         ^
     Previous   Current     Next
Codeberg's server is always at the Current period. If a token of the Previous period is submitted, which was generated between 00:00-00:30, it will be accepted, as long as that token was submitted between 00:30-01:00. So at a minimum you always got 30 seconds to submit the token, before it becomes "invalid" and Codeberg always accept two codes (Previous, Current)