Integrating with Read the Docs
This article will guide you through integrating Codeberg with Read the Docs to allow automatic build of your documentation. It will show you how to connect Read the Docs to a Git repository hosted on Codeberg. To learn how Read the Docs works, take a look at the official Documentation.
Forgejo is currenly not official supported by Read the Docs, so this may break in the future.
Registration
If you do not have an account yet, you must sign up with readthedocs first.
After sign-up you need to login with your user to access your dashboard.
Create new Project
This steps shows how to create a new project on Read the Docs
- On the Read the Docs dashboard click "Import a Project"
- If you have connected Read the Docs with some provider e.g. GitHub, you see a list of your repos at that provider. Ignore it and click "Import Manually". You should see this screen:
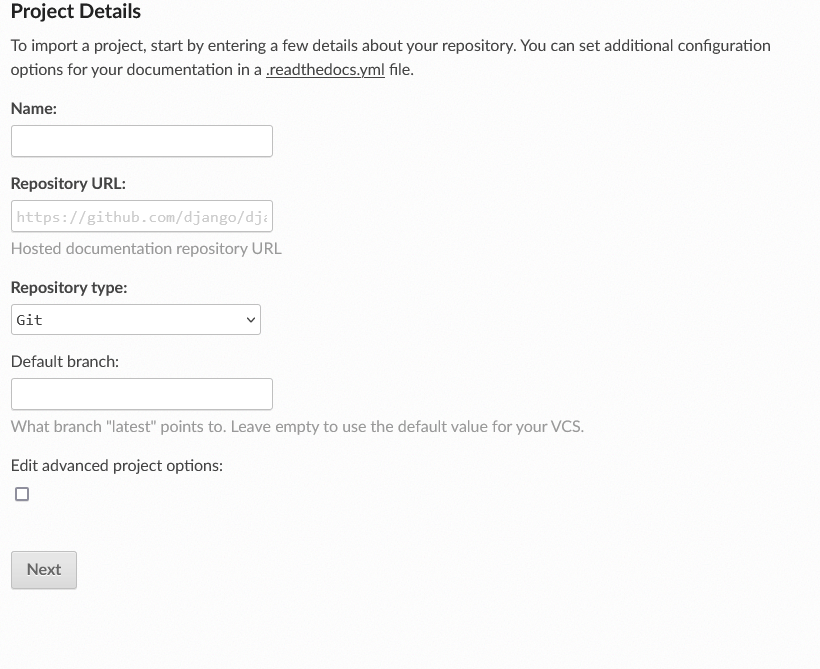
- Under "Name" enter the name of your project. Under "Repository URL" enter the Git URL of your repo. It has the form
https://codeberg.org/<owner>/<repo>.git. Leave the rest as it is and click "Next" - You should now be on your Project page and see a warning that the project doesn't have a valid Webhook. Ignore that. Go to Admin->Integrations. You should see this screen:
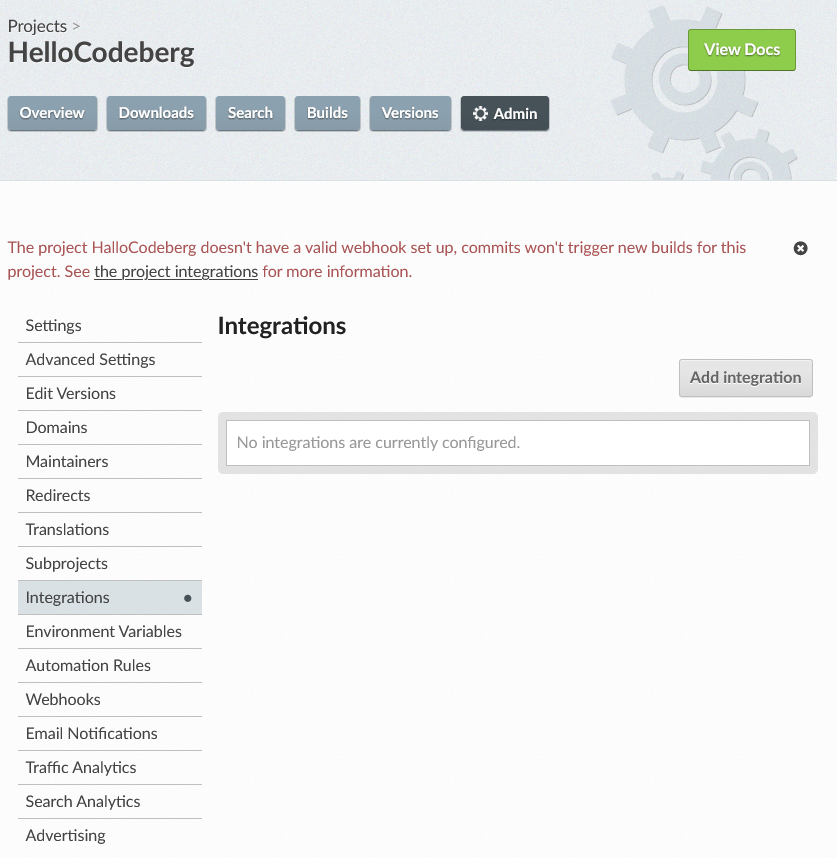
- Now click on "Add Integration" and select "GitHub incoming webhook" as type. You should see this screen:
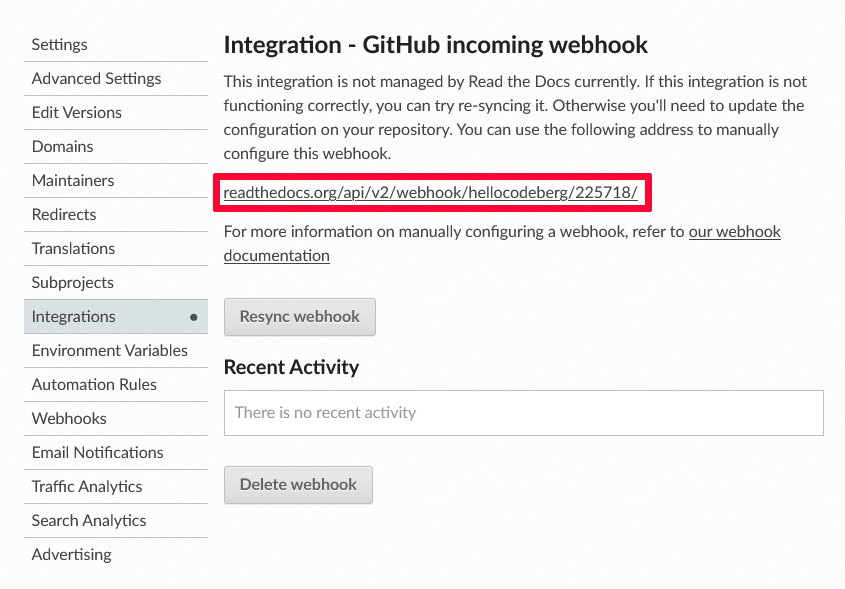
- Copy the URL that is marked Red in the Image. You should keep it secret, as it allows pushing to your Documentation
- Now go to the "Webhooks" Section of the settings of your Codeberg Repo. Create a new "Forgejo" Webhook
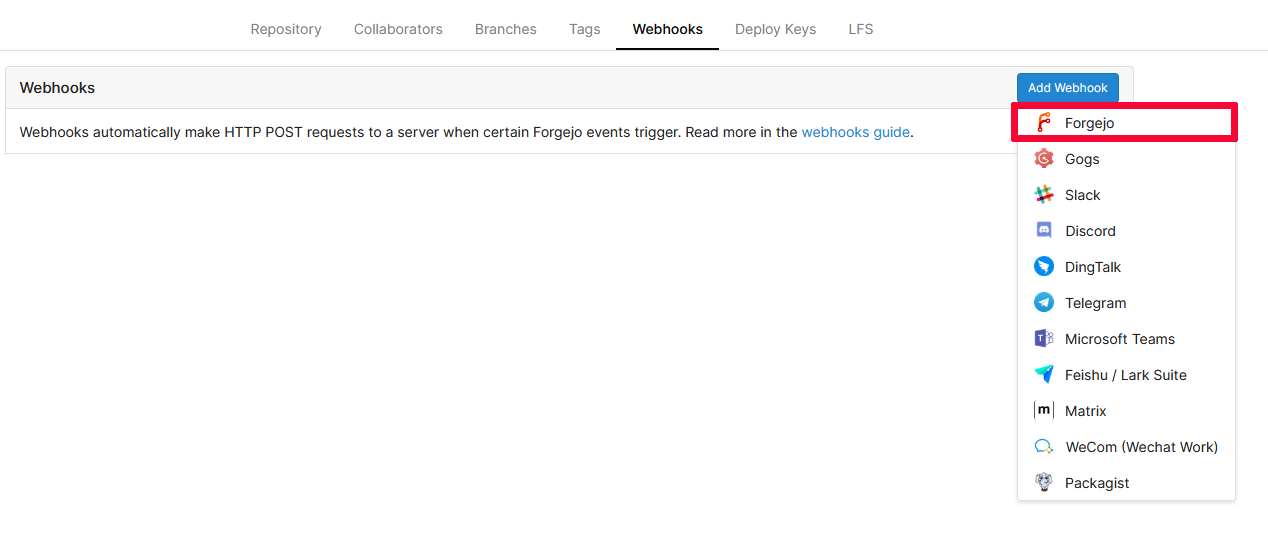
- Under "Target URL" enter the URL you copied from the Read the Docs webhook
- Under "Trigger On:" select "All Events"
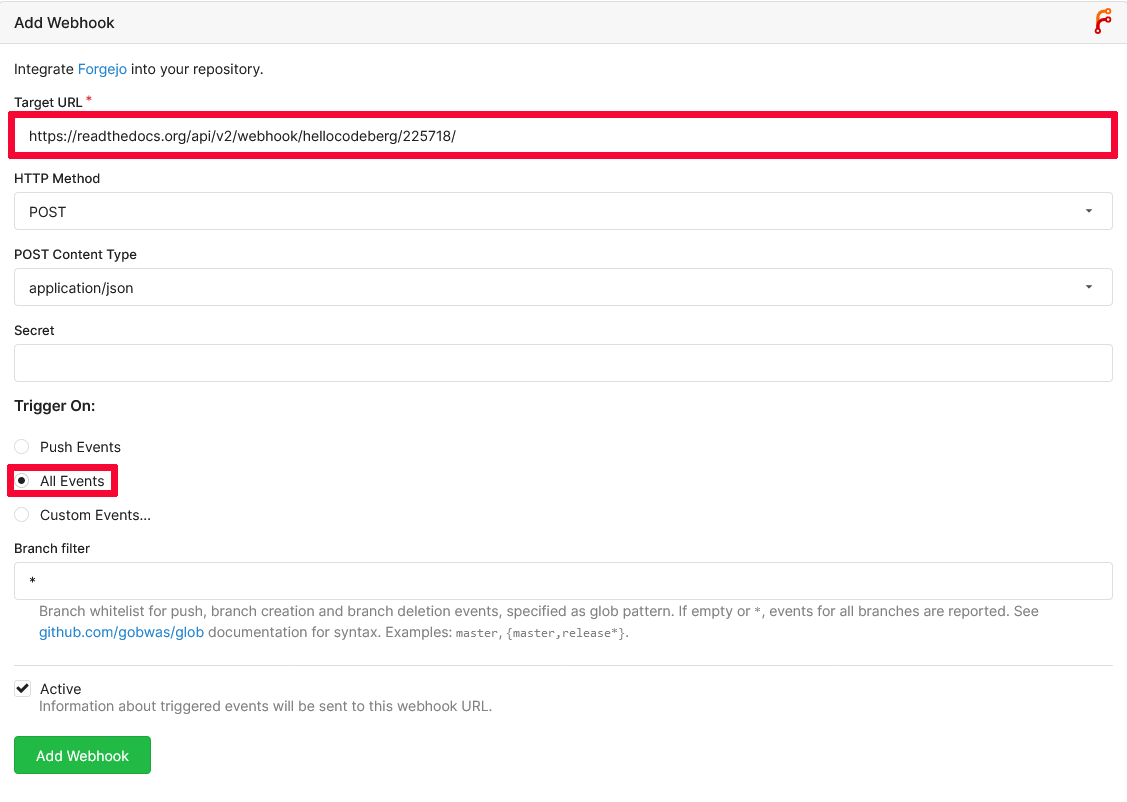
Congratulation! Your done! To test it, push a commit in your Codeberg Repo and see if the documentation rebuilds. This may take a few minutes.
Migrate Project
You may migrate a repo that is connected to Read the Docs from another git forge to Codeberg. In this case, follow these steps:
- Go to Admin->Settings of your Project on Read the Docs
- Under "Repository URL" enter the Git URL of your Codeberg Repo
- Now go to "Integrations". You will see a existing Integration
- Click on it to open the Settings of the Integration
- Now click on "Delete Webhook"
- Jump to Step 5 of the "Create new project" section and follow the steps there
Hey there! 👋 Thank you for reading this article!
Is there something missing, or do you have an idea on how to improve the documentation? Do you want to write your own article?
You're invited to contribute to the Codeberg Documentation at its source code repository, for example, by adding a pull request or joining in on the discussion in the issue tracker.
For an introduction on contributing to Codeberg Documentation, please have a look at the Contributor FAQ.
© Codeberg Docs Contributors. See LICENSE